


NEW
Community Platform
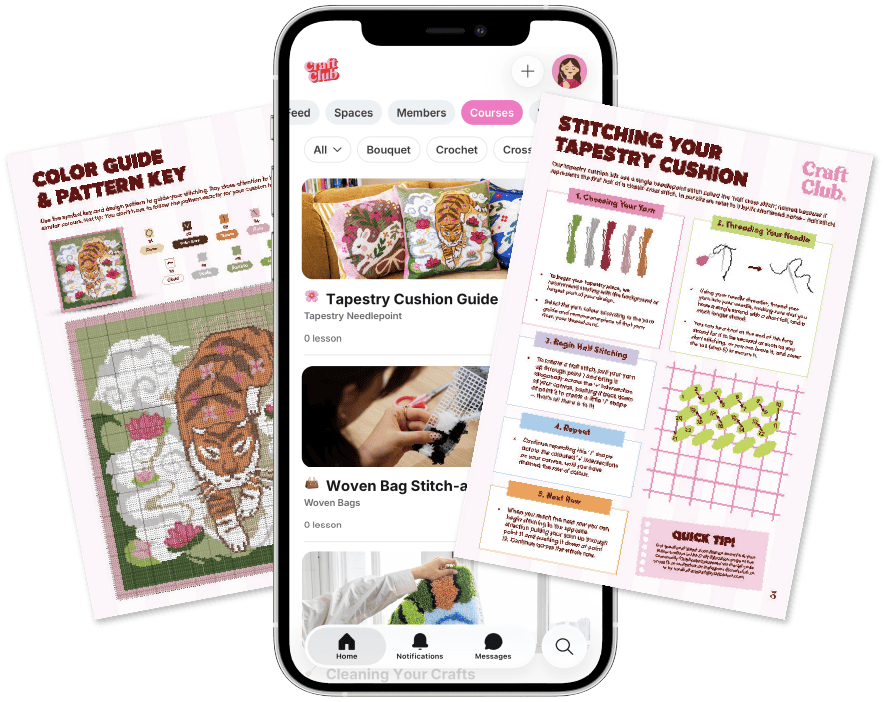
Your kit includes free access to our Community Clubhouse platform. Available as an app or website - access upgraded tutorials, and a buzzing community of makers!
What's Inside The Clubhouse


Checker Woven Bag Guide
Welcome to the guide for your Checker Woven Bag Kit!
Below you will find all the information and tutorials you need to complete your own sweet and fluffy woven bag. This guide works for both colour versions of the Checker design.
❤️❤️❤️
Inside Your Kit
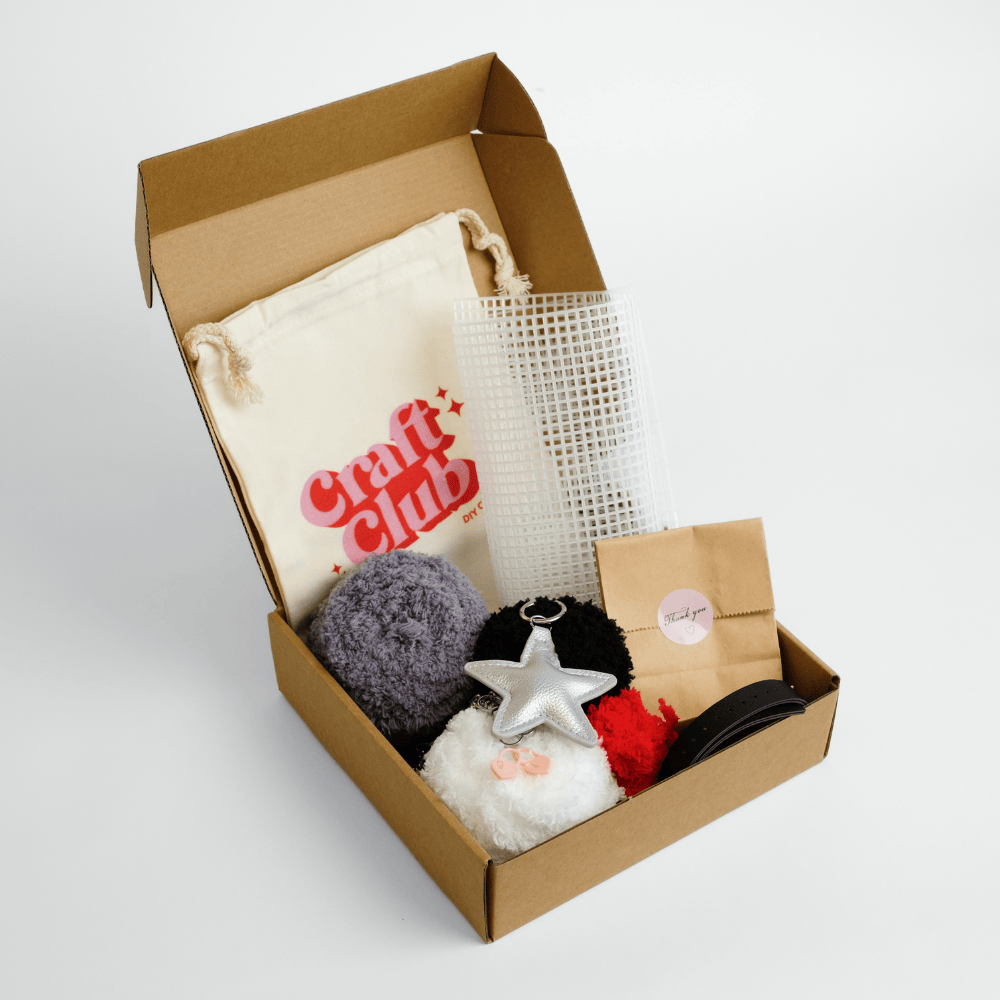
Your woven bag kit includes ...
Materials & Fibre:
⭐ Plastic canvas base for your handbag
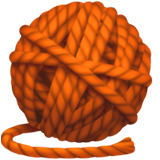
⭐ Feather yarn in multiple colours
⭐ Canvas multi-use project/lining bag
⭐ Leather-style top handle straps
⭐ Gold or silver cross-body chain
⭐ Gold or silver magnetic closure
⭐ Gold or silver 'handmade' name plate
⭐ Gold or silver ring hardware x2
⭐ Padded decorative keychain
⭐ Silky strap threads x2
Tools:
⭐ Plastic weaving needles x2
⭐ Metal sewing needles x2
⭐ Heart stitch markers x3
⭐ Flower needle threader
Learning:
⭐ Online instructions and video tutorials
⭐ Pattern for transferring
Optional additions:
You'll need a pair of craft scissors for this project - we recommend using any of the pairs sold on our website, such as our rug trimming scissors as they're sharp and a great size for multi-use crafting.
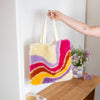
Woven Bags - Checker
Welcome to Your Woven Bag Kit! ✨
In this video I'll be introducing you to your woven bag kit and showing you the finished piece we'll be creating together.
What You'll Find Inside Your Kit:
Below we'll take you through all the squishy and fluffy materials you'll find inside your Woven Bag Kit, plus the tools that will help you to create your masterpiece.
Before You Begin:
This guide will take you through each section of your bag with a detailed tutorials below. We recommend watching these tutorials carefully if you're new to plastic canvas weaving, or its your first time creating one of these bags.
You'll find two types of videos below:
- Woven Bag Video Tutorials: These videos take you through each step of creating your woven bag, starting from part one to part four. Watch each video carefully to learn the techniques used to bring your woven bag to life.
- Stitch-A-Long Videos: These are a mindful way of crafting along side us! They will show you the full process of creating your bag at a slow and realistic pace, paired with some mellow lo-fi beats. These are NOT the detailed instructions, so if you're still learning how to weave your bag, make sure you stick to the Woven Bag Video Tutorials above.
Finally, if you do get stuck with any part of your woven bag process - reach out to us! Our team is always here to help. You can find us at hello@craftclubco.com or DM us on Instagram or Tiktok, and we'll provide a helping hand. Our support is always practical and personal, so no matter what you need, we're here for you.
With that - its time to dive in! ❤️
Part One: Transferring Your Pattern
The very first step to creating your bag, is using a pen or marker to copy your pattern from your onto your plastic canvas! Inside your kit you'll find a paper pattern which shows each individual stitch that you will make onto your bag.
In the video below I'll explain how to read your pattern, as well as how to transfer it onto your plastic canvas base using both the A3 tracing method and counting method.
Usually you'll use your A3 tracing method to begin, and double check your stitches with the counting method.
Why transfer the pattern? Copying your pattern onto the canvas will allow you to relax and stitch away, without having to constantly refer back to your paper pattern.
Traditional stitching types often work without a transferred or printed pattern, so this step is optional. But whether you're a beginner crafter or seasoned stitcher, we highly recommend it as it's always easier to work with a transferred design.
Part Two: Weaving Your Bag
In the video below I'll be teaching you how to weave your bag! We'll be taking you through all the steps needed to cover your canvas with your gorgeous feather yarn, including techniques like simple stitches, outline stitches and filler stitches. Whilst it may sound scary, we promise these weaving techniques are easy-as-pie!
Your Checker Woven Bag design uses lots of simple, horizontal stitches. This tutorial will teach you the technique using our Tulip Woven Bag design, which is slightly more complex. The stitches are exactly the same, you'll simply be replicating the short horizontal stitches that are visible on your A3 pattern, rather than vertical stitches shown in the video.
Tips & Tricks:
Now that you have the basics done, this video will show you a few tips and tricks for levelling up your stitching. Including how to speed up your stitching, how to cover mistakes and how to cover any visible canvas.
TIP: Feather yarn is a wonderfully forgiving material due to its soft, blendable nature. This means if you make a mistake with your stitches, its really easy to cover it up!
- Miss a stitch? You can add the extra stitch later and it will blend seamlessly.
- Made a stitch in the wrong place and didn't notice at the time? Simply cover the unwanted stitch with a few layers of the correct yarn colour.
- Have some extra yarn leftover? You can play with adding extra stitches and details onto your bag, that will blend in as though they were part of the original design.
The only negative to feather yarn is that it can get messy, particularly as you cut each piece as the ends malt when first snipped. This will only be an issue during the making stage of your project, as the yarn does not shed once it is stitched onto your bag. Use a vacuum cleaner to tidy up the floor around your workspace, and use a lint roller to clean up any fluffy stuck to your clothes.
Optional Heart Detail:
Something special about our Checker Woven Bag design is the option to add some pizazz with these simple heart details.
If you are stitching the black version of this bag, then we've included a small amount of contrasting red yarn that you can add to your piece.
If you are stitching the rainbow version of this bag, we've included a small amount of extra yarn in all colours, so that you can play around with adding hearts using contrasting tones.

Part Three: Constructing Your Bag
Now that you have the three pieces of your bag woven its time to stitch them together to create your bag shape. This will involve stitching the edges and corners of your bag pieces together, and covering the exposed edges with yarn. This part is one of my favourites, because you really start to see your piece take shape!
Part Four: Adding Straps and Details
You are officially on the home stretch! It's time to add the finishing details to your bag which will take it from a fluffy rectangular box to a wearable masterpiece!
Attaching Your Top Handles:
You'll start by adding the top handle straps first before your chain strap. You'll do this with your leather-style handles, your silky thread and your metal embroidery needle. You'll also find your needle threader comes in handy for this section!
Watch the tutorial below to see how the technique for adding your handle.
Attaching Your Chain Strap:
Now it's time to move on to your chain strap - this one is even easier! All you are going to do is attach two gold rings to either side of your bag and clip on your chain. Check out the video below where we show you the simple technique.
Adding Your Final Details:
You're almost finished! The very last step is to add the final details to your gorgeous woven bag. These include adding the magnetic closure, your 'handmade' metal plate to the front of your bag and adding your optional keychain and inner lining.
Watch the video below and in no time you'll have your completed woven bag!
Checker Bag Stitch-A-Long:
Below you'll find a full stitch-a-long walkthrough of creating your Checker Woven Bag. This is not a full tutorial, instead its a mindful crafting video showing you the process of bringing your bag to life.
Weaving The Bag
This first video dives into the process of weaving your bag. It works through the main panel that makes up the front, bottom and back of the bag, followed by the smaller side sections.
Assembling The Bag
This next video takes you through the assembly process of your woven bag. Whilst our video tutorials above recommend a certain order of assembly, you don't need to follow this exactly. Once you've crafted the rectangle shape of your bag, you can add the hardware and strap details in any order you like.
And you're done! Congratulations
We hope you've had a lovely time creating your very own fluffy woven bag to use and enjoy! We'd love to see your woven bag in action, so feel free to tag us on socials and show us your creation.
Happy crafting!
Nakisah (Craft Club's Founder) xx
Join The Club!
Be the first to know about new products, special releases, and much more!
