


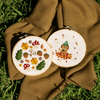


Twinkling Christmas Tree Guide
Welcome to the guide for your TWINKLING CHRISTMAS TREE Moss Coaster Kit!
Inside, you’ll find everything you need to craft a magical festive scene — complete with a glowing Christmas tree, sparkling ornaments, and cosy winter tones. A little piece of Christmas joy to bring warmth and wonder to your craft corner 🎄✨💫
Inside Your Kit
You'll find everything you need to craft your own adorable butterfly oasis!
Yarn & Base Materials
⭐️ Bobble Yarn in Variegated Green and White
⭐️ Feather Yarn in Snow White
⭐️ Milk Yarn in Light Green Sage
⭐️ Chenille Yarn in White
⭐️ Mohair Yarn in White and Icy Grey
⭐️ Pipe Cleaners in Pine Green, Dark Green, Brown and Silver/Gold Metallic
⭐️ Mini Pom Poms in Mixed Colours
⭐️ Satin Ribbon in Pink
⭐️ Pressed Felt in white
⭐️ Latch-Hooking Canvas Base
Crafty Tools
⭐ Plastic Latch Hook
⭐ Glue Stick for Hot Glue Gun
⭐ Needle & Needle Threader
⭐ Cotton Thread
⭐ Plastic Weaving Needle
What You'll Need
✂️ Craft Scissors - Any size will work, but we recommend our ergonomic moss scissors.
⭐ Hot Glue Gun - Available at many DIY retailers, you don't need a fancy glue gun to have a big impact on your craft. Any heat setting will work.
Inside Your Kit
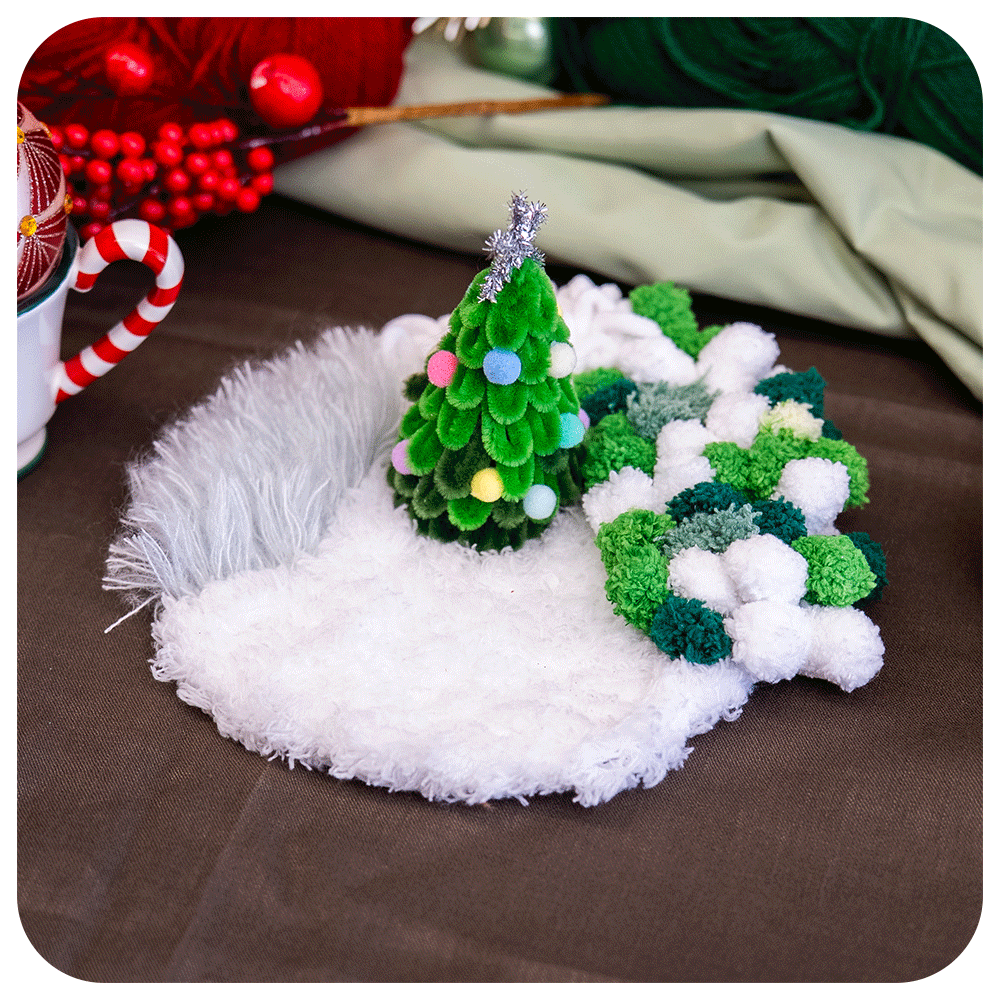
The Moss Box - Twinkling Christmas Tree Guide
Step-By-Step Guides
Below you'll find each of the steps to making your festive coaster, with recommendations on the order to stitch each element. If you're a newbie to crafting it will be worth following this step-by-step, so that you can get comfortable with the techniques and tools used in this kit.
But if you want to create your own variations, you're more than welcome to stitch each section in whichever order you want! Don't feel constrained by our guidelines.

Step 1: Fuzzy Loops (using white chenille yarn)
Step 2: Bobbles (using variegated green and crisp white bobble yarn)
Step 3: 'Hair' Moss Latch-Hooking (using white and ice grey mohair yarn)
Step 4: Feather Yarn Grass (using white feather yarn)
Moving onto your decorative elements ...
Step 5: Pom Poms (using sage green milk yarn)
Step 6: Pipe Cleaner Christmas Tree (using pine green and dark green pipe cleaners)
You can also use the image below to see the details of each element on your coaster.


Twinkling Christmas Tree Walkthrough
Below is a video that will walkthrough the creation of your moss coaster. This video will show you the process, but it won't include detailed tutorials. So if you're new to making moss coasters - make sure you keep on scrolling! You'll fine in-depth tutorials for each technique below.
This video is intended to be a relaxing walk you through of each step in your moss coaster, so that once you know the techniques you can craft along with us.
Step-By-Step Tutorials
This guide will walk you through each step of your moss coaster, and include video tutorials for each technique you will need to learn. If you're already familiar with the techniques used for moss kits, you may just want to watch our walkthrough video (shown above) without needing to dive deeply into each step.
First Things First - Transferring your Stencil
Your first step in creating your moss coaster is to transfer your coaster design from the stencil onto your latch-hooking canvas. To do this you'll need your canvas and a marker of some kind. We recommend using a sharpie or similar permanent marker, but a regular pen or drawing marker will work just fine.
Simply lay the canvas on top of your stencil and use the marker to trace the design behind it. The stencil matches our design with the smaller shapes roughly indicating where we will stitch each type of 'moss' in the following steps.
Feel free to get creative with the shape of your design, as your coaster doesn't have to be exactly like the stencil. You could make it a little larger or smaller depending on how you'd like to use it. Just remember to leave a 1/2 inch space between your coaster shape and the edge of the canvas.
TIP: Why not move the smaller shapes around within your coaster? You can get creative with the layout.
1. Weaving Fuzzy Loops
The first step to creating your moss coaster is going to be adding Fuzzy Loops at the top of your template, using a lovely white chenille yarn. You'll be creating these loops using your latch-hooking tool. Watch the video below to learn the technique.
2. Weaving Bobbles
Next, its time to stitch your Bobbles into the shape on the right side of your coaster template! You'll be working with two colours of bobble yarn, a variegated green yarn and a crisp white yarn.
To create a cool-toned coaster, you'll be removing any yellow colours from your variegated green bobble yarn. To do this, prep your yarn by trimming each length so that it has 2x bobbles on each, and remove any yellow sections. We've included enough extra yarn inside your kit so that you wont run out.
Next you'll be combining your cool-toned green bobble pieces and your crisp white pieces when stitching your bobble moss. Follow the video tutorial below to learn the technique.
3. Latch-Hooking 'Hair' Moss
This next textured section will be familiar to you if you've done one of our latch-hooking kits before. This time we use a slightly different technique to latch hook our yarn to look soft and 'hairy'. Use your latch-hooking 'hair' moss technique to fill in the space to the left side of your template.
Preparing your cut yarn:
To begin, you'll be cutting your white, ice grey mohair yarn into 8cm lengths. To do this, you'll create a cardboard template that is 4cm in width, and wrap a strand of each colour mohair yarn around the length of the template. Use sharp scissors to cut down the side of your wrapped yarn, creating many small pieces of 8cm yarn.
Before you begin, take time to create at least 2-3 bundles of your cut yarn so that you can get into the groove without needing to stop and cut more.
Our video below will show you the technique for creating a simple cardboard template!
Latch-hooking colours:
Now that your yarn is prepared, its time to stitch! Each latch-hook knot will be made using 4x pieces of mohair yarn, to give it a dense but ultra-soft feel. You'll also be using a combination of both your white and icy grey yarn in these stitches.
Pre-cutting your yarn together will mean that its easier to make stitches that include 2x strands of white and 2x strands of icy grey mohair.
TIP: You don't need to make this perfect for every stitch though, you can add more/less of each colour as you please.. For example, you might want to alternate stitches between your white and icy grey. Or you might like to create patches of each colour. We've included more than enough of each mohair ball, so you can really make it your own!
Trimming: I find that these 'hair' sections look lovely when they are left shaggy and organic. But you can use a sharp pair of craft scissors to trim any uneven or stray lengths of yarn, if you would rather keep them looking neat and orderly.
4. Weaving your Feather Yarn Grass
Now it's time to weave in the 'grass' on your mossy coaster. For this coaster design we've kept it nice and simple with a single feather yarn colour, so that the focus is on the sparkling Christmas tree you'll be adding later to the piece.
Using your crisp white feather yarn, use the technique below to weave the yarn onto the remaining space on your canvas.
Follow the below video tutorial to learn how to weave your grass section. Its a very simple technique, using your weaving needle you'll be stitching back and forth to cover the canvas section.
6. Pom Poms
Now that your coaster base is entirely covered, its time to add some fun, decorative details! You'll be creating 2x small trimmed Pom Poms using your sage green milk yarn.
Use the following tutorial to learn to make pom poms.
In this coaster, we've created 2x small pom poms with approximately 15x loops around the fingers. Once they're tied, trim the ends and use your weaving needle to fluff up and separate the strands of milk yarn.
We've nestled these pom poms amongst the bobble yarn from step 2 of your coaster, but you can also attach them to any other space on your coaster.
TIP: You can use any excess mohair yarn to create extra pom poms. Simply create them in the same way as the video tutorial below, but add extra loops around your fingers to account for the thinner weight of yarn. Mohair pom poms can have as many as 50-60x loops to make them nice and fluffy.

7. Pipe Cleaner Christmas Tree
Onto my favourite part of this moss coaster creation! Time to craft your very own twinkling tree to sit in the middle of your snowy forest.
Pipe Cleaner Colours:
You will need the following colours to finish your tree, the number of pipe cleaners needed is approximate for this design because it really depends on how closely you layer each of tree pieces. We've also included extra pipe cleaners just in case you need them!
4-6x Pine Green
1-2x Dark Green
3x Brown
1x Silver or Gold
Watch the video below to bring your tree to life!
Decorative Extras:
To really make your coaster your own, we've included a range of craft materials to decorate your tree. Our video tutorial below will show you how to create and add each of these elements.
Star - Choose between silver or gold metallic pipe cleaners for completing the star on top of your tree.
Mini Pom Poms - Choose between a range of pastel and classic shades when adding your tiny 'ornaments' to your tree.
Pink Ribbon - Tie your ribbon into a miniature bow to decorate the top of your tree, create feature 'ornaments' or add to the greenery details on your coaster.
Tree Stump - Use your brown pipe cleaners and tree base template to create an optional stump/trunk for the bottom of your tree. Creating a stump will make your tree more realistic, but it won't be as stable when sitting on your coaster so we recommend only creating this if you're planning on gluing your tree to your coaster permanently.
Backing your Coaster
Congratulations on finishing the main part of your coaster! Now you're onto the home stretch, its time to work on the back of your coaster.
There are 2x steps to finishing your coaster, which we show in the below tutorial. First you'll need to roughly trim the canvas edging and sew it down to the back of your piece.
Then it's time to back your coaster with your felt either with glue or by sewing it. If you're using it as a decor piece or to hang on the wall, it may be better for you to leave it at it's current stage. It will be easier to hang on a wall hook if the back is free from felt.
Sewing your Backing
Our kit includes all of the supplies you need to sew the backing of your coaster.
To sew your fabric you'll want to trace the shape of your coaster so that you can cut out the felt fabric to match the shape. You can do this with a pencil or pen.
You will then need to pin your felt backing to your coaster so you can begin sewing the edges. You can do this by using sewing pins, bulldog clips or even tacking the back with a hot-glue gun. I find bulldog clips the easiest method of holding my coaster to the felt.
Using 3-strands of your cotton thread, begin stitching your canvas to your mossy coaster using a whip stitch. This just means that you will whip your thread around and around the edge of your coaster as you go around. Don't worry if your stitches don't look perfectly neat, they'll blend into the grass on your coaster and won't be visible when you're finished.
Gluing your Backing
If you have any fabric glue handy or a hot glue gun then you can also glue the backing of your coaster. We've included a glue stick for a standard craft hot glue gun, as well as a glue paddle if you have fabric glue.
To glue your fabric you'll simply place fabric glue across the middle of your felt square and place your coaster on top. Allow it to dry so that the coaster is secure - you may want to put a heavy book on top of your coaster to add pressure. Once it's dry you can take a sharp pair of scissors to cut around the coaster.
You can then top up the glue on the edges, if any sections are lifting up.
Join The Club!
Be the first to know about new products, special releases, and much more!
