


NEW
Community Platform
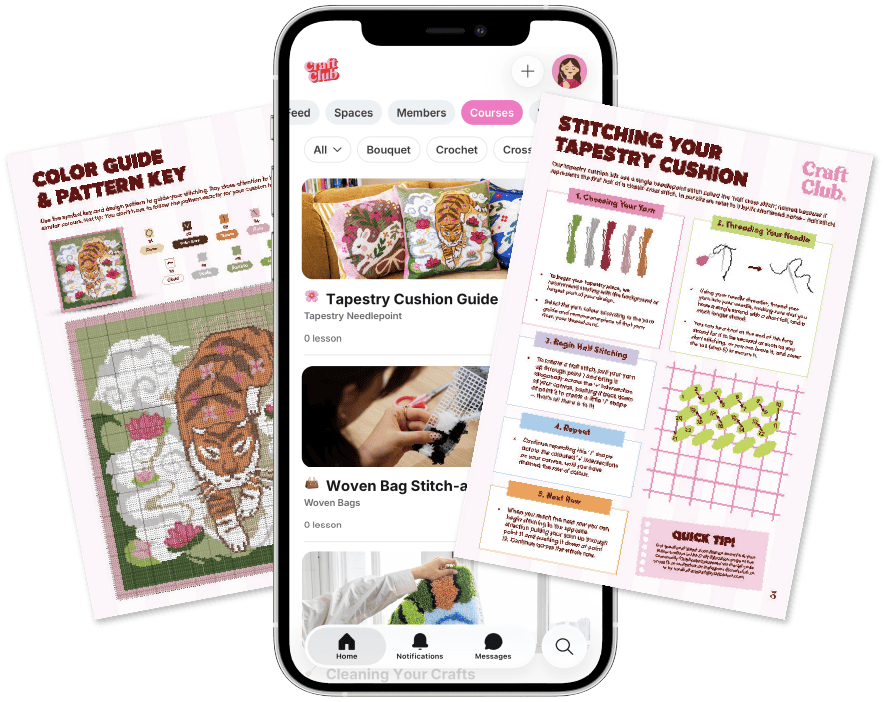
Your kit includes free access to our Community Clubhouse platform. Available as an app or website - access new drops, downloads, and a buzzing community of makers!
What's Inside The Clubhouse


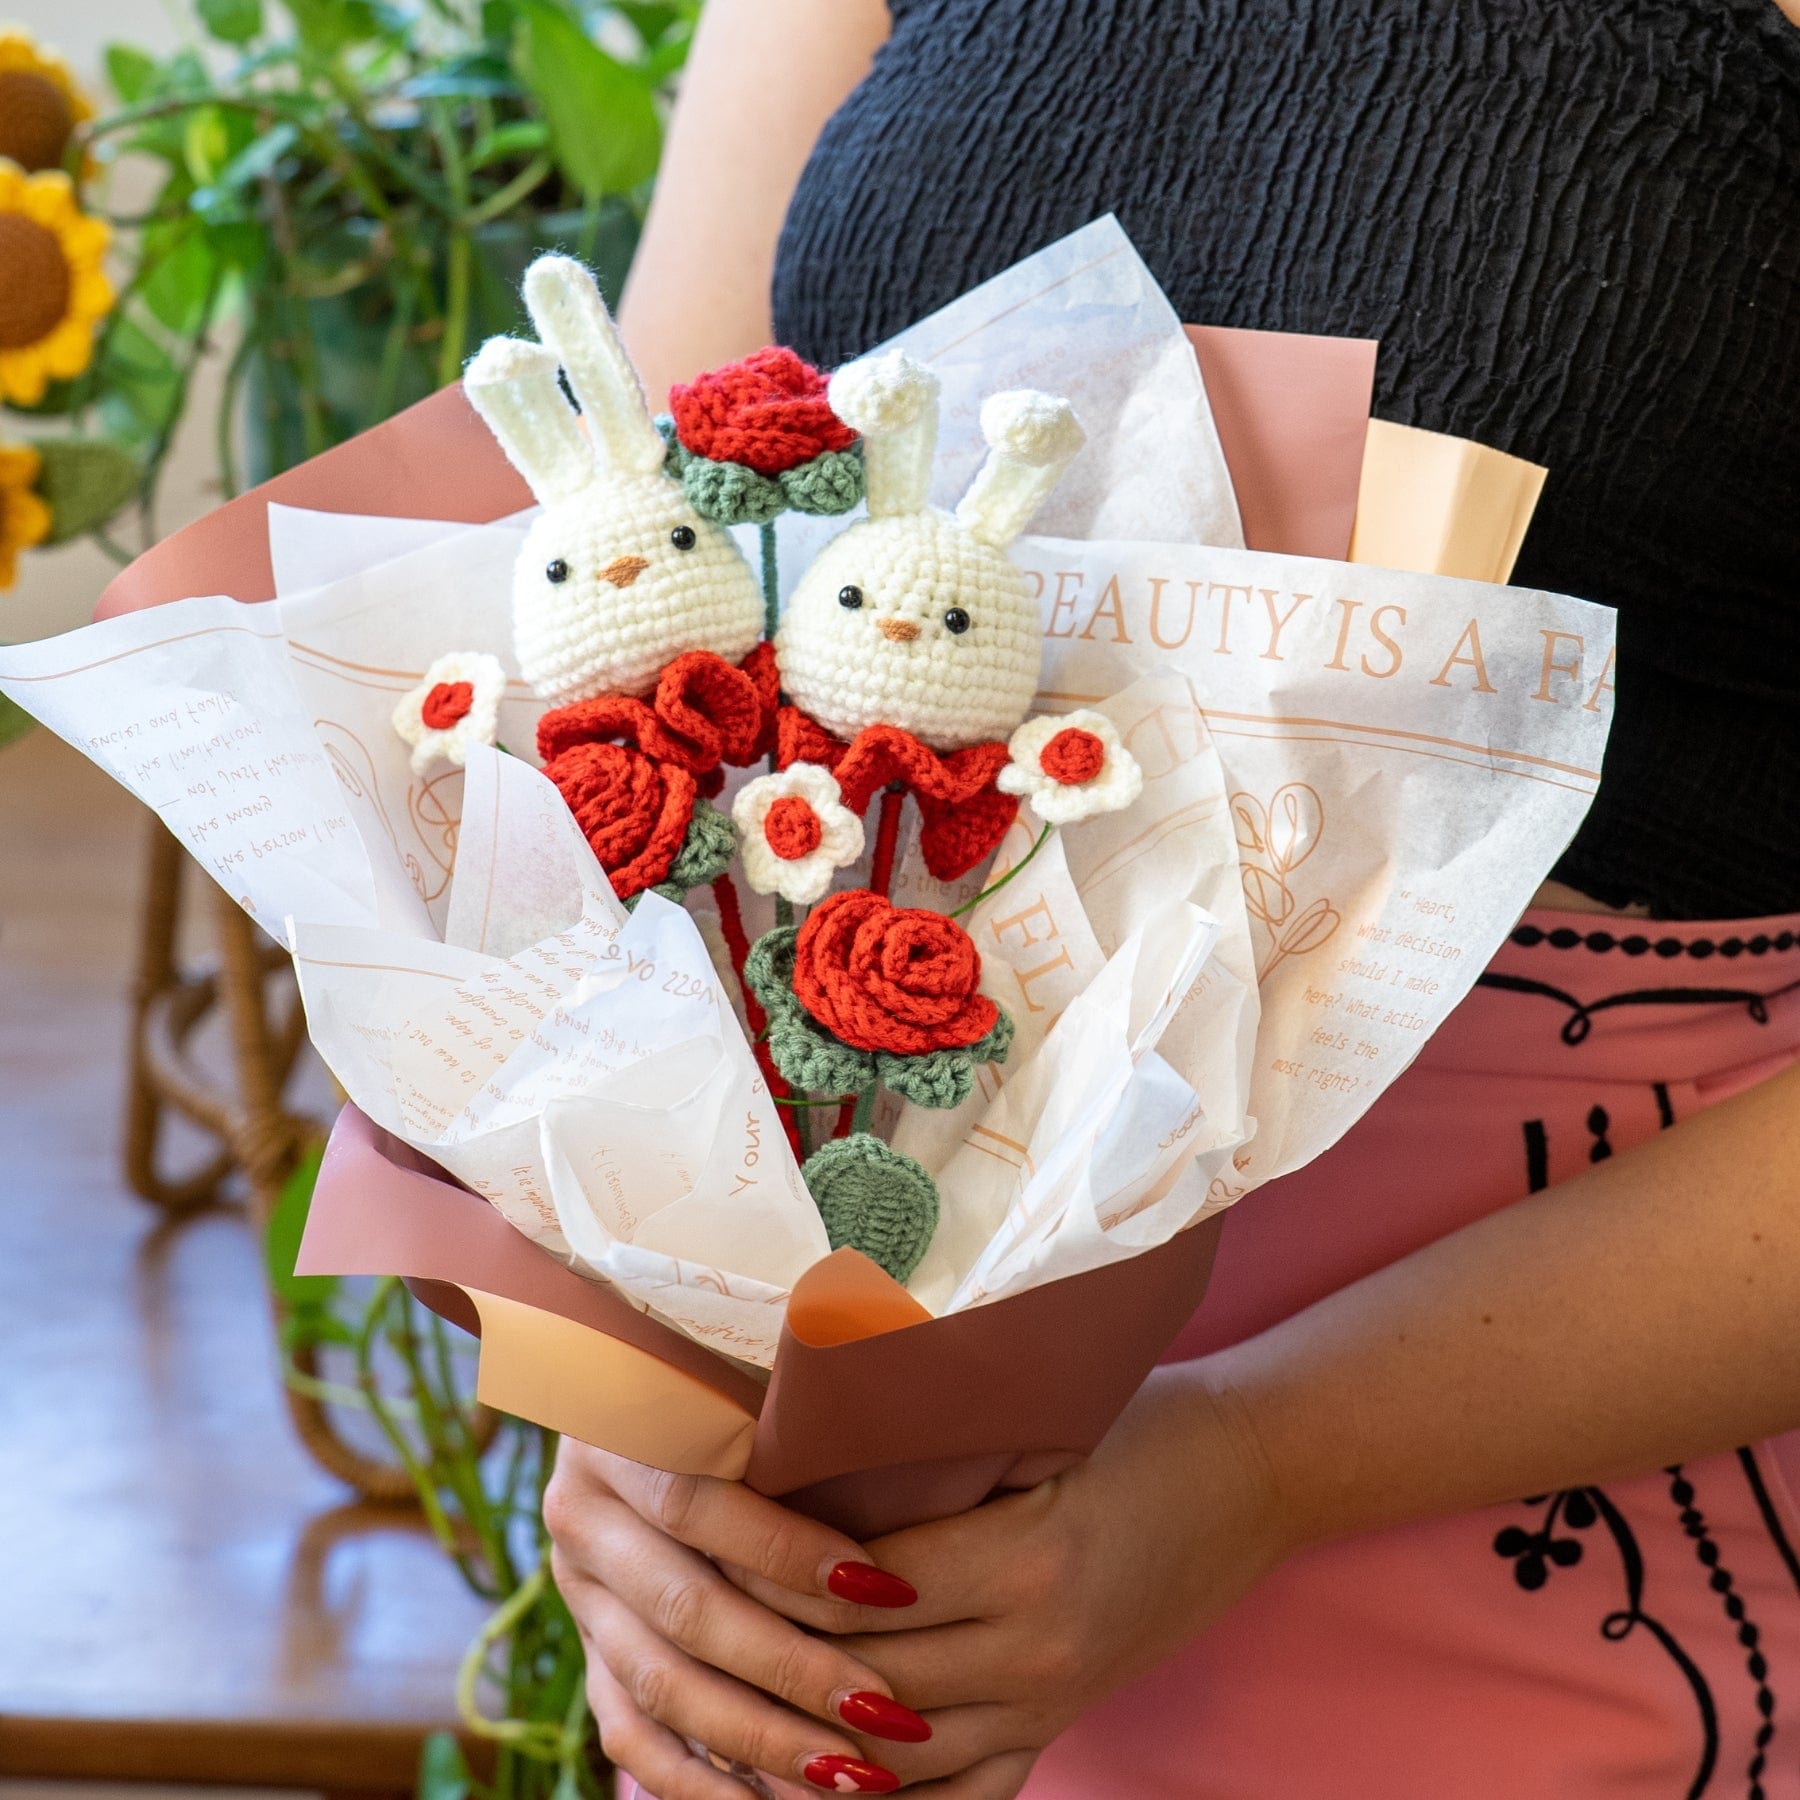
Bunny Bouquet Crochet Guide
Welcome to our digital resources guide for your Bunny Bouquet crochet kit!
Thank you for choosing to support our small creative business with your purchase.
🌼 🌼 🌼
How to use this guide
Depending on your Crochet Experience
💗 Crochet Newbie: If you're new to this craft, we recommend you go through this guide from top to bottom. Start off with our two practice videos: Foundational Stitches and Amigurumi Techniques. These two videos will teach you everything you need to know about the basics, ensuring that you have a great time when you start working on your crochet kit.
💗 Comfy Crocheter: If you've crocheted before and you're comfortable with the most common stitches (ch, sc, hdc, dc, magic rings) then you're probably ready to dive straight into the project. You can skip the intro videos and go straight to the meat of the guide.
💗 Crochet Pro: If you're an absolute pro and then you probably don't need our guide at all! If you want to save time, you can download the PDF pattern below and get straight into your project.

Inside Your Kit
Your pack comes with all the materials you need to complete your bouquet. Including:
⭐ 3x colours of milk yarn - in yellow, dark green and dark brown
⭐ Double sided crochet hook - in 2.5mm and 2.3mm sizes
⭐ Polyfill stuffing for filling your finished sunflower
⭐ Wires for stem and leaves
⭐ Paper and plastic for wrapping your 'bouquet'
⭐ Metallic ribbon
You'll also need these simple additional tools to complete your bouquet:
⭐ Scissors
⭐ Hot glue gun

Download Your Pattern
Click the button below to download your PDF pattern for this kit. This can be used either as support with the digital guide, or if you're a crochet pro you can complete your kit only using this guide.
Crochet Terminology
This kit uses US terminology. Scroll across to see the full list of pattern terms.
- ch - Chain Stitch
- sc - Single Crochet
- hdc - Half Double Crochet
- dc - Double Crochet
- tc - Treble Crochet
- sl st - Slip Stitch
- inc - Increase
- dec - Decrease
- FLO - Front Loop Only
- BLO - Back Loop Only
- x - Repeat this step as instructed
- turn - Turn your work
- * y * - Stitch the steps inside the asterisks into one stitch
- ( y ) - Repeat the steps inside the brackets
- [ y ] - Total stitches in the row/round
What you'll need to make
These are the elements you'll be making for this kit. You may have enough materials to make extra elements, depending on how much yarn you use practicing.
⭐ 2x Bunny Heads
⭐ 4x Bunny Ears
⭐ 2x Red Neck Ruffs
⭐ 3x Red Roses
⭐ 3x Rose Leaves
⭐ 3x Leaves
⭐ 4x White Flower Petals
⭐ 4x Red Flower Middles
How to Crochet
If you're a crochet newbie, it's worth watching these two videos to learn the basics of crochet.


Bunny Bouquet: Step-By-Step Crochet Guide
Below you'll find each of the steps to making your Bunny Bouquet. We recommend downloading the PDF pattern so that you can read it alongside watching the video guides.
Step-By-Step Video Guide
Sometimes learning visually is easier than reading instructions, so if you're new to crochet then we recommend you watch our full video guide on making your Bunny Bouquet.
Our full guide is pretty long since it takes you through every detail of your crochet kit. So please use the timestamps listed in the video description if you need to jump ahead to a specific section.
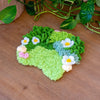
1. Bunny Head
The first step in creating your bunny bouquet is to make your little bunny heads. You're going to be making two heads, although you might have enough yarn leftover to make a third depending on your yarn tension and how much practice yarn you use up.
2. Bunny Ears
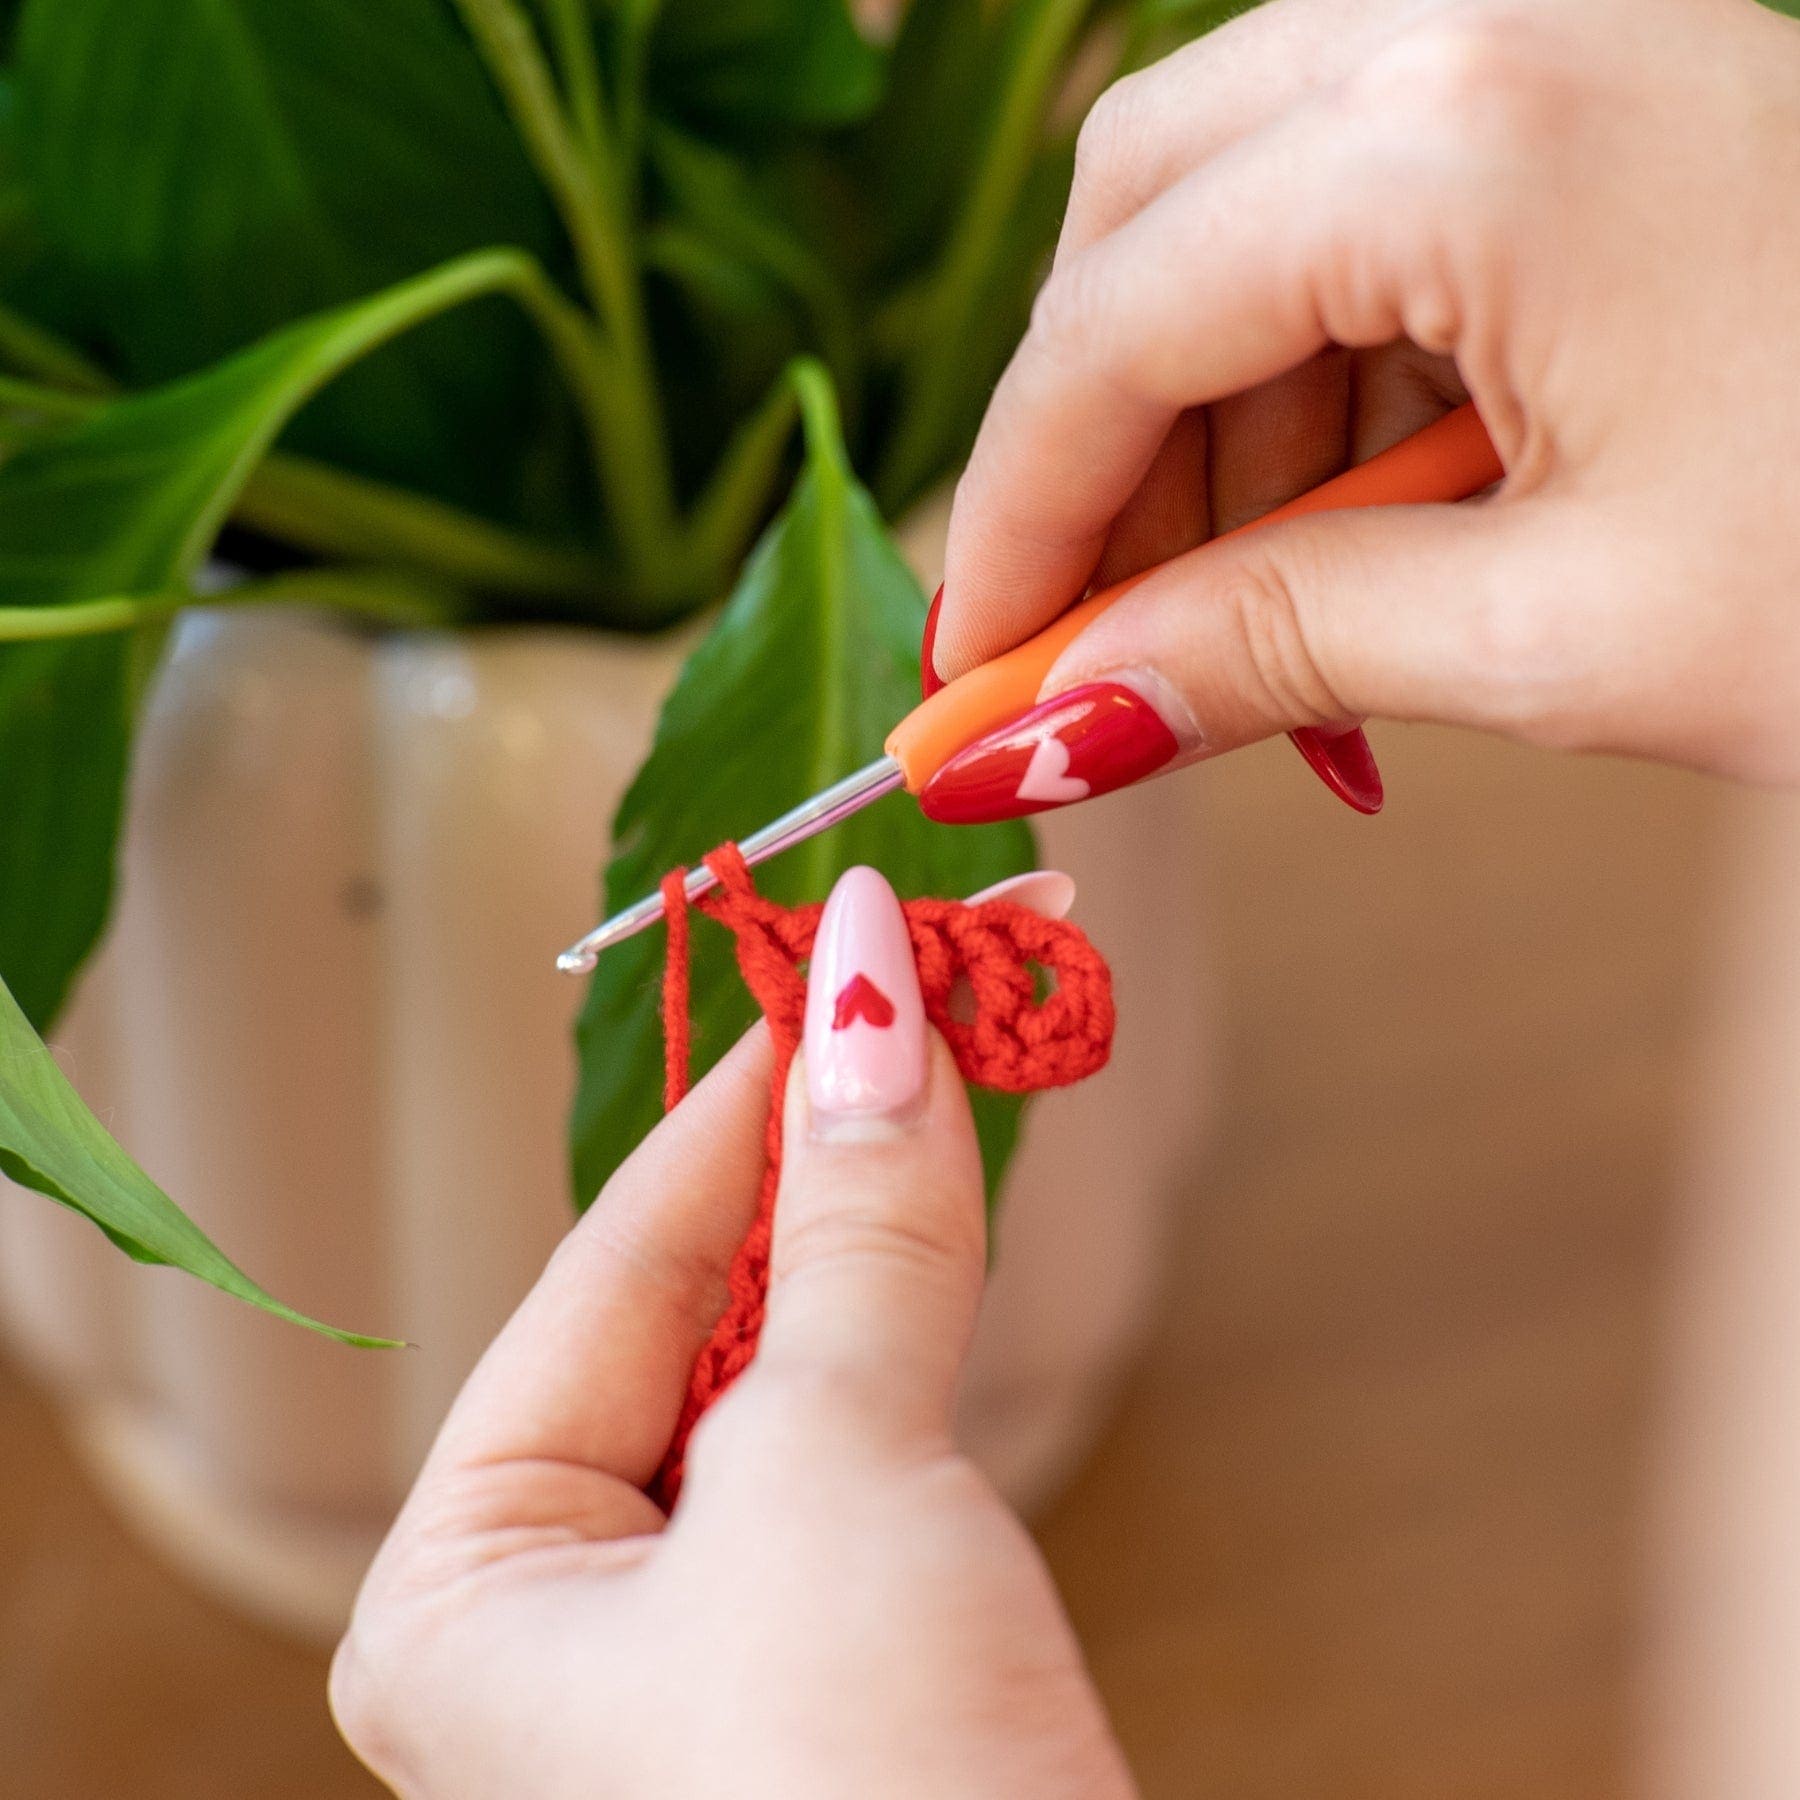
Next you'll be stitching the ears of your bunny. You'll want to make two ears for each bunny, the left and right ear both use the same pattern. The ears will be stitched onto a wire, this can take some getting used to if you're new to crochet because it can be fiddly to hold. Its best to stitch slowly and steadily when crocheting onto wire.
You'll also notice that we've split the pattern for Round 1 into three sections:
- The first half of the ear
- The tip of the ear
- The second half of the ear
We've done this because its an easier way for a crochet newbie to visualise the shape of the ear. If the pattern is all listed in one round, it can also look overwhelming for someone learning.
If you're really not enjoying the wire, you can simply stitch your ear without it! You can then hot glue the wire to the back later. This option isn't as pretty, but it'll do the trick if you don't want to stitch onto the wire.
3. Red Neck Ruffs
Now its time to make the curly ruffled ruff that goes under your bunny's head. Making ruffles is a fun technique to learn and appears quite impressive even though its easy to achieve.
4. Red Roses & Rose Leaves
Onto your roses, you're going to stitch the red rose petals first followed by the green leaves. We recommend stitching three roses and three leaves, but you may have enough yarn to make more depending on your yarn tension and use of practice yarn.
Your rose petals are stitched in rows while your leaves are stitched in the round.
5. Large Leaves
Now its time to stitch the leaves! Your leaves are is stitched onto a wire, which will allow you to move your leaf around and position it how you would like. Just like the ears, this can take some getting used to. We've also split the pattern for Round 1 for the same reasons that are listed under Step 2.
You're going to stitch three leaves.
6. White Flower Petals & Yellow Middles
Your last element to stitch four little white and red flowers. These flowers are made up of two pieces, your white petals and the red middles.
7. Assembling your Bouquet
Now that all your elements are ready, its time to assemble! We recommend you watch the assembly videos as it can often be easier to understand visually.
Make sure you weave in all your ends before you start.
Assembling the Bunny Head:
- Start by attaching your bunny ears, pushing the wires into the top of the head. When you're happy with the position, secure with hot glue.
- Then use hot glue to secure the two black eyes.
- Next its time to stitch the nose of your bunny using the weaving needle and brown yarn provided. You'll simply be stitching 3-4 straight lines across to create the nose shape. We recommend watching the video guide for this section.
Assembling the Stems:
- For your Bunny stem, you'll start by pushing the bunny onto the top of your stem wire, securing it with hot glue. Then push the ruff under the bunny head and secure with glue.
- For your Rose stem, you'll start by putting a dab of glue on the end of your wire and wrapping the red rose around it. Add extra glue as needed to secure. Then thread your rose leaves up the stem and glue under the petals.
Adding Flowers & Leaves:
- Weave your white flowers and red middles together using your weaving needle and the tail of the white flowers. Then use the smaller green wire to create a stem. Weave this stem around your Bunny stems.
- Attach your leaves to the Rose stems by wrapping the wire around the main stem and adjusting the height and angle to your liking.
- When you're happy with the positioning of your flowers and leaves, its time to wrap the stems entirely in yarn - red for your Bunny stems and green for your Rose stems. Use a dab of glue to secure the yarn to the top of your stem and wrap the yarn around and around until it covers the whole length of the stem. Sometimes it can be easier to keep the yarn still and turn the stem instead.
8. Wrap your Bouquet (optional)
We've included a wrapping paper bundle inside your crochet kit, which includes wrapping paper, tissue paper and a ribbon. You can display your bouquet in any way you like, so this step is optional. But adding the wrapping paper can be a lovely addition if you're wanting to give your bouquet as a gift!
There's a whole range of styles that you can use to wrap your bouquet! We've provided two types of wrapping so that you can use the wrapping style that you like best. Here are a few curated Youtube videos and shorts from other fantastic makers that will show you wrapping options:
'5 Ways to Wrap a Bouquet' Short by Floral Supplies
This video by Floral Supplies is great for getting a quick idea of the options when it comes to wrapping a bouquet. Your Bunny can be wrapped in the exact same ways, although you might want to bend your wires back to make them shorter for some bouquet styles.
https://youtube.com/shorts/o0dH5bCCfG8?si=Oh-zZJRHDKKEE__4
'How to Wrap a Single Sunflower' Short by @cherricrochet161
This is a beautifully simple method for wrapping a bouquet! I love this video because it clearly shows the steps for wrapping more complicated bouquets but in a way that is easy to visualise. Use this method if you would like to make a smaller bouquet and keep some of the elements for yourself (we won't blame you!)
https://youtube.com/shorts/kZMW4vCyCYU?si=9IPlqarggHMSEo6b
'Flower Wrapping with Three Pieces' by 베러버
This is a great tutorial for wrapping a floral bouquet, and it uses the same materials you'll find inside your kit. To get the same effect, you'll need to cut your wrapping paper and tissue paper into multiple smaller pieces.
'How to Wrap Flowers | Crochet Flower Bouquet' by Lingzhi Handmade
This is a slightly more complicated technique for wrapping your bouquet, but it makes wonderful impact if you're giving your flowers as a gift! This tutorial requires one extra element of wrapping (they have used a soft fabric paper for the ruffles at the bottom) but you can achieve the same effect by using your tissue paper for the bottom sections as well as the sheet behind the flowers.
Thank You!
We hope you've enjoyed your Craft Club crochet kit! If you have, please leave us a review - they make a huge difference for our small business.
If you have any feedback or questions, please reach out to us at hello@craftclubco.com
We're always looking to improve our kits and instructions so that they're the best they can be for our customers!
Join The Club!
Be the first to know about new products, special releases, and much more!
